-------------------------------------------
Happy Hats...
Here's a birthday inspired one created in last minute land when party hat stocks had run out.
Please note - the following activity requires no glue or paint and is therefore suitable for frantically busy households and frazzled, unravelled Mummies...
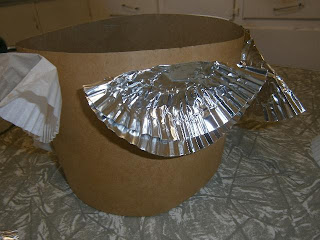
Start with a head sized cardboard band, stapled together at the ends...
...upend your pantry and find the cup cake papers. Fold a few in half, so they look like little fans...
...staple the cup cake fans around your Happy Hat, taking care not to staple on any stray digits...
...if you're three, it should look a bit like this...
...and a bit like this if you're me...
...and if you just can't leave it alone, get the scissors out and cut a fancy pattern around the edge.
It might be also worth sticky taping the backs of the staples so they don't scratch.
Now, take a deep breath, light the candles and..."Happy Birthday to you................"
Alternatively, I reckon you could fashion quite the crown for your little prince or princess using the same techniques.
-----------------------------------------
Fun with Fallen leaves...
Just before we dive headlong into a long cold winter, get the kids out in their gummies and collect the last of those glorious red, gold and orange leaves and make this leafy, toowit toowoo-ing windowsill friend! (and don't worry about having to find a permanent home for him alongside all that other kiddie craft...his leaves will soon turn crispy and fall off. Sweep them up and farewell him to the rubbish truck fairies!
Start by bringing your leaves in on a tray for a warm and dry by the heater...
...then scrunch up a few pages of yesterdays news...
...wrap them up so your owl is a little present...
...tape his bum up...
...then sit him on it and tape up his top...
...tape on some twiggy leggies...
...now, scrunch or roll a bit of sticky tape so the sticky is on both sides like double sided tape. Stick it to the back of a leaf, then stick the leaf to your owl...
...working your way up from the bottom and around his sides and back, cover him in feathery loveliness...
...put two leaves on top like ears then find yourselves something for eyes. We used old cardboard ribbon rolls which we glued on to some paper, then cut around. We then scrunchy, sticky taped two buttons to this paper to give "Busby" a whimsical, wise expression. You could also use a chopped toilet roll, some cup cake papers or hand drawn eyes...get creative and make yours a bit spesh...
Have fun!


